


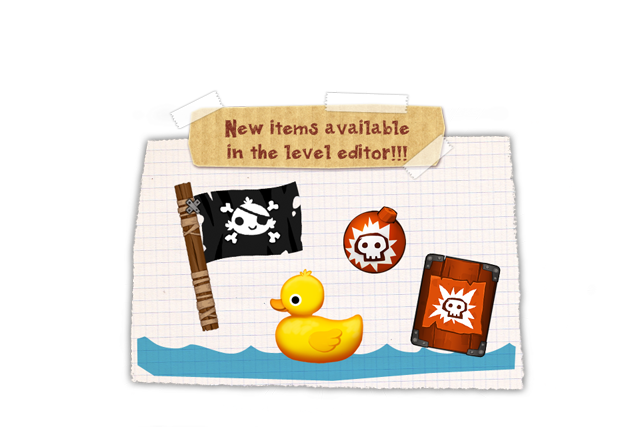
iBlast Moki 2 – The level creation process
// August 30th, 2011 // iBlast Moki
Building complex and beautiful levels with iBlast Moki 2 was not an easy task. Here is how we achieved it.
The painful level creation of the first iBlast Moki
In the first iBlast Moki, the level creation and iteration was really painful. We were using the tools illustrator and Xcode, and just getting the level into the game took probably 2-3 minutes (saving, rebuilding the binary on the Mac, transferring the game to the iPhone and launching the game). A small change was really long to implement and test. Some changes were even done blindly as some of the objects were not at the right scale between illustrator and the game, so we were moving things around hoping that it would be at the right location.
Only late during the development, we added the in-game level editor but it was not used to create the story levels. It was only meant for users to create and share their levels once the game was released.
For the second one, we knew we wanted to build more than 90 levels with only 2 persons and all of this in less than 6 months, we had to revisit this process and create a really fast and iterative level design flow.
Fast iteration is the key
The first thing was to use the game to build and iterate as fast as possible on the levels. We used the first iBlast Moki editor as the base, but took everything apart to rebuild a fresh and solid physics editor. We added a new button play at the top of the screen in the editor, and you could just edit your level, do a modification, press play and be in the game in less than 1 second, test your change and press the button edit again. This entire process was only taking less than 15 secs compared to the old 3 minutes for the first game. On top of that, working on the iPad and using your finger to build a level is really a fun and intuitive process.
This really allowed us to have a better level design in general but also be more creative as we were not slowed down by the iteration and we could just try something quickly and if it didn’t work, remove it.
The toolbox
The first editor was still missing some major features that we really wanted in this game, such as the bezier curves, the joints and all the new gameplay items. The first 3 months of the development were spent only building the editor, we knew it was the key and it had to be robust and easy to use.
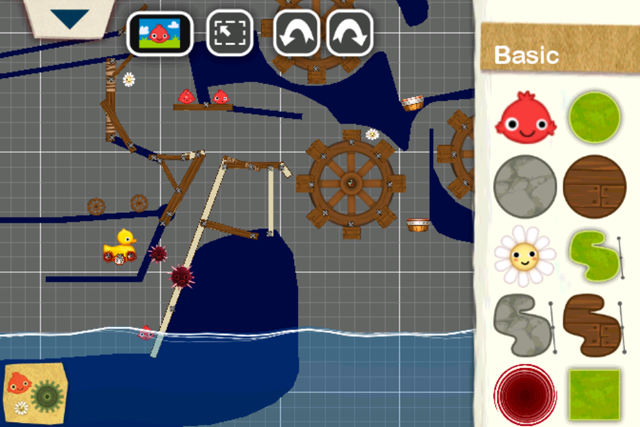
The Bezier Curves
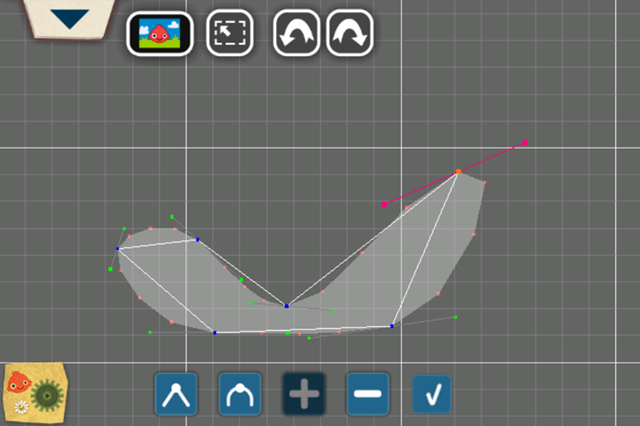
The bezier curves is one of the biggest addition to this sequel, all the levels were built using the curve tool to create the static ground. We took some inspiration from the curve tool in illustrator and implemented the same feature. So you can create freely any vector form, by placing the key points and adjusting the tangents at those points to smooth more or less the curves.
Once the shape was built you could select its material, it could be the ground and be static, or it could be dynamic with different physical materials such as wood, stones or metal.
The Joints
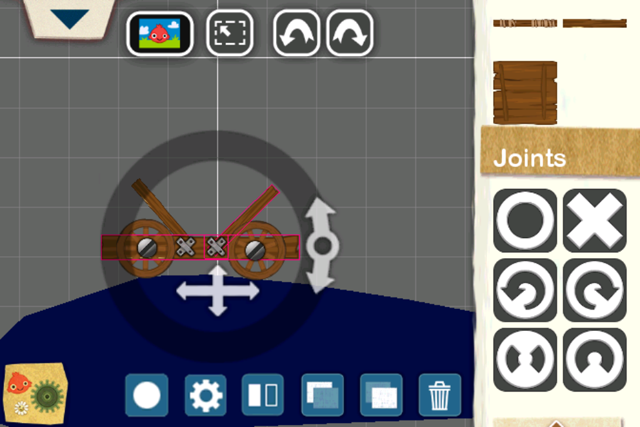
The joints were the second biggest new feature we added. We really wanted to be able to build more complex contraptions, such as vehicles, boats, or any other thing we could think of. To achieve this, we added 6 different joints, a pivot joint to be able to have dynamic objects rotate around other, a motor to build motorized vehicles and a few mechanical joints with a springy or stiff connection.
In the example above, the cart is built with 3 wood logs, 2 glue joints to hold the logs together, 2 wheels and 2 pivot joints to have the wheel rotate freely.
Other gameplay items
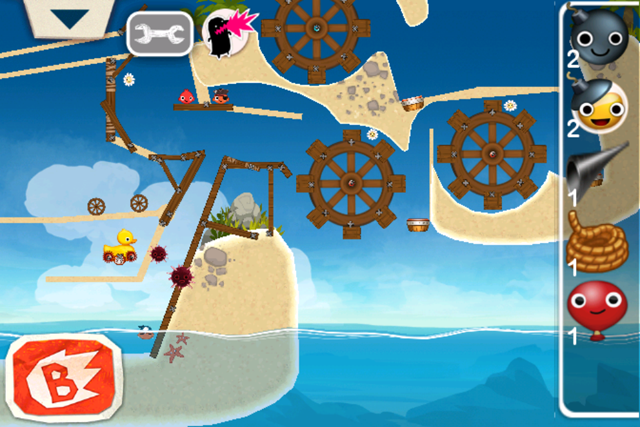
We have a lot of other fun physics elements such as explosives, water, balloons, cactus, wheel which are unlocked as you progress through the game. I’ll let you play with the game and the editor to avoid revealing too much here!
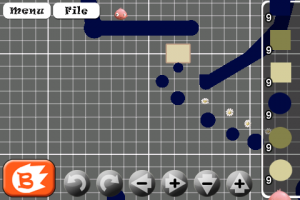
Sharing
When we had the level built with all the functionalities in place, Thomas and I were both iterating quite a lot on it. To be able to achieve this iteration, the key feature was to be able to share those levels online, so we didn’t have to send a new build to each other every day. As soon as we made a change to the level, the other was able to download it and iterate on it. We were lucky to have this feature from day one and this gave a lot of richness to our levels as we both have different ideas and level “styles”.
Decoration
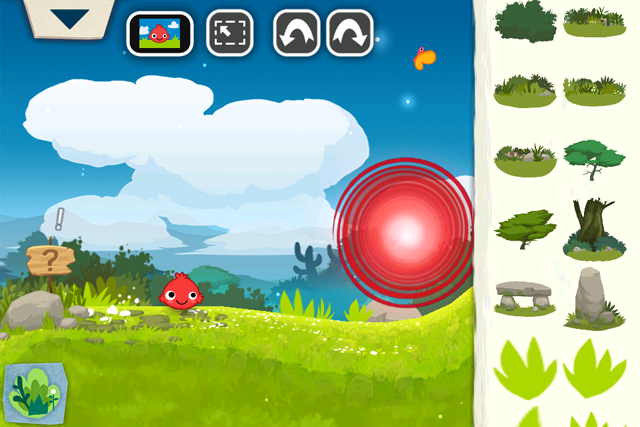
Once we were happy with the gameplay of the level, we had to make it pretty. We have a special decoration mode in the editor, where you can choose and place the props. Those props are just used for the decoration and the mokis don’t collide with them.
We also added some stickers we could place on top of every objects, we were using them to add some variety to the ground and break the repetition of the main motif (such as the mushrooms and small rocks in the image above) or even give life to some of the dynamic elements by adding a mouth and eyes.
Conclusion
With all this new features and the fast iteration process, we were amazed by how fast we went through creating all the 90 levels. And we even had a few beta testers helped us in the level creation, some of them were so good that we added their levels to the story levels.
With this tool released into the wild we are seeing some amazing levels being built every day, and we are super happy to see how creative the community is. Here is one of the level which was recently built, and in the top 20 of the best rated level. You should definitely check out the top 10, I am just blown away every day.
We are thinking of doing a contest where the best levels will be included in the next update of iBlast Moki 2, stay tuned for more information about it.
8 Responses to “iBlast Moki 2 – The level creation process”
Leave a Reply


- Rey827 said: I've been playing iBlast Moki 2 for a while now, a...
- Guest said: Dare we hope for a Fourth of July theme? Just a ...
- jeaney said: Want a Cookie Shop!!! :)...
- Carlos Madrid Pelegrí said: nice!...
- Kristina Chen said: Hey Godzilab! Check out this awesome fan drawing f...
- Debbie McGregor said: I am a total Happy Street fan. I am on it all day....
I asked about your level creation workflow and you wrote a whole blogpost about it! This is what I call listening to his fan. 😉
Great post!
[…] that's wrapped up in a cute and easy-to-understand skin. On the latest company blog, Godzilab walks through the level creation process for the game, showing how they arrived at the best way of putting together levels for these cute […]
Moki Contest !!!
Great idea
Can’t wait …
There should be a voting option for the level
Godzilab makes.
so the people like me can vote
And let you know which level is the best
you made.
That would be cool
Hi Godzilab
when you update your new levels this time
Please add Designer name next to Level.
So fans can follow them on twitter of Facebook
It’s a shame we Know nothing about u ppl.
I love the music you have made and
the Games you have given us…
Thanks
WoW
Great idea
When is the update coming out ?
Can anyone tell us please
I’ve been playing iBlast Moki 2 for a while now, and I’m still playing thanks to all the user made levels that are still being made.
Is the contest still on because I would like to submit my level “The Walking Machine 2,” or is the contest no more?
It has been about 4 years and there is still a “Coming soon…” after the Steam city world.
Is iBlast Moki dead?
New levels by the community are still being made each day even the user Broken Bells, the person who made a lot of the featured levels still plays occasionally, but it seems like Godzilab has given up on this game.